Each course consists of one or more sections often called topics. The
course sections (topics) are learning content holders of the course
lessons and study material. Each course has a common resource area which holds common course resources like URLs, Files, Videos. On its turn course topics may have their own resources. Course format types and structure are explained in the article Course Structure and Format Types Explained.
This article assumes there is a course already created in your course catalog and you are going to build content. How to create courses is explained in the Create New Course article.
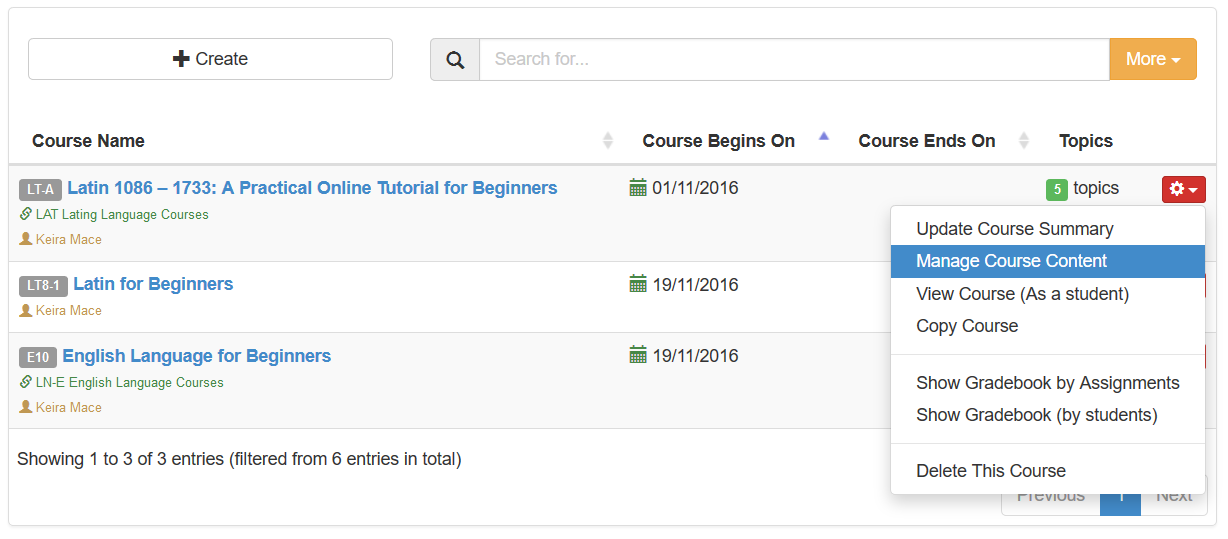
Log on as admin or a teacher (who has access to build courses) and click on Courses -> Course Manager (or My Courses if with a teacher profile). This will take you to the course catalog. Find your course and click on the red options button next to it. Then click "Manage Course Content" to open the course builder.

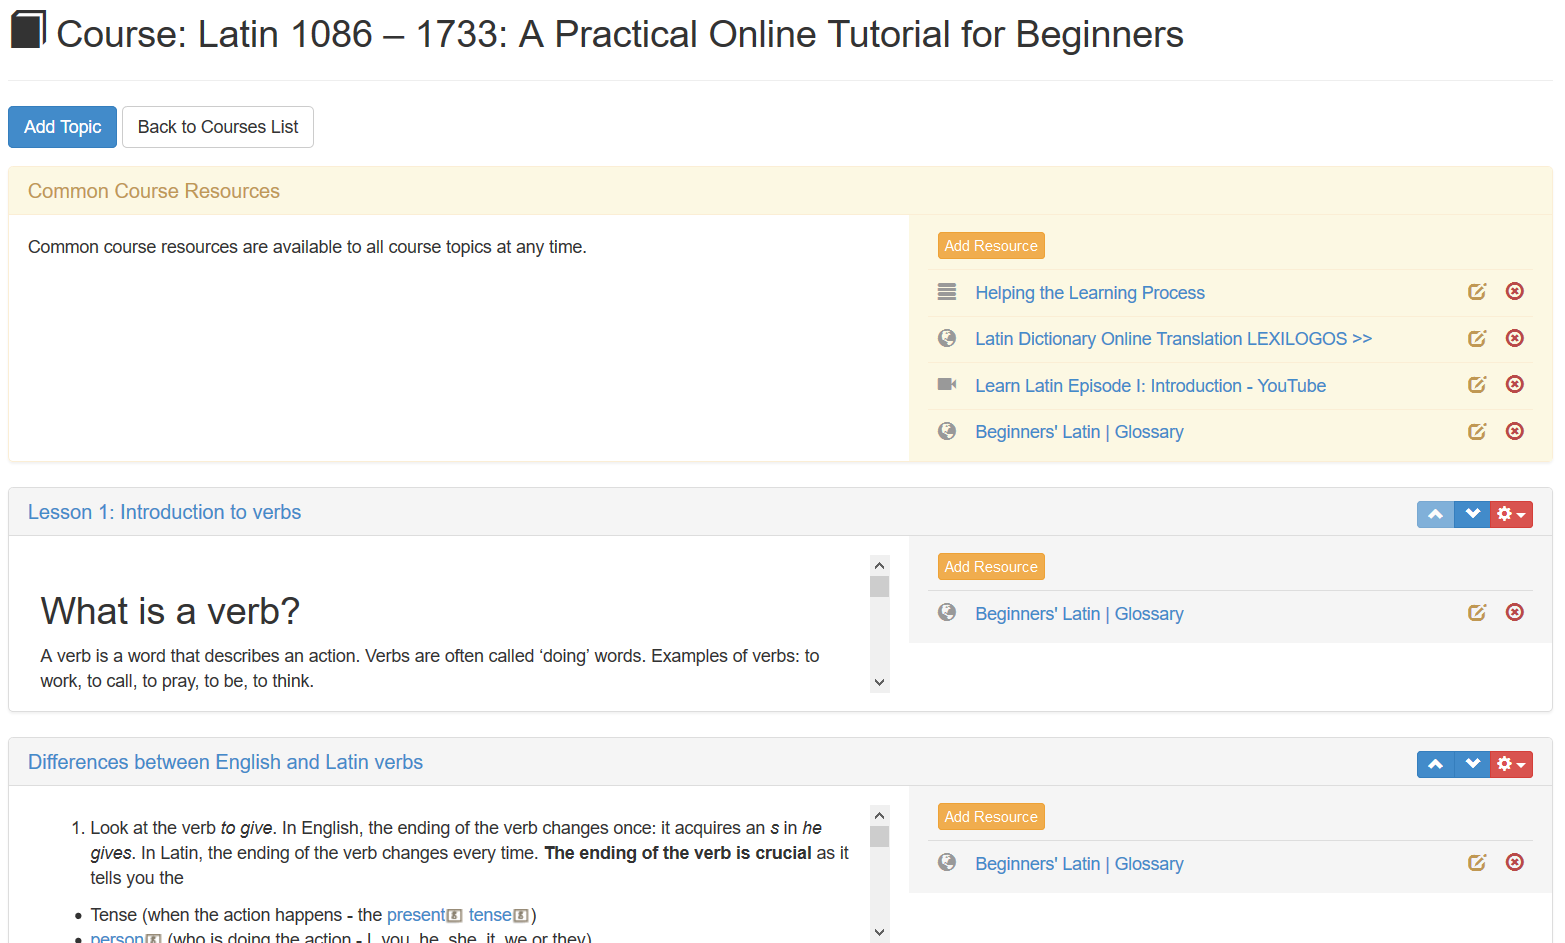
The course builder displays all course sections along with the common course resources section on one page. How students see the course depends on the course forma applied in the course summary.
The course builder allows you to create course sections, upload resources, link activities or pages to sections or to the common resources section.

Adding a New Topic
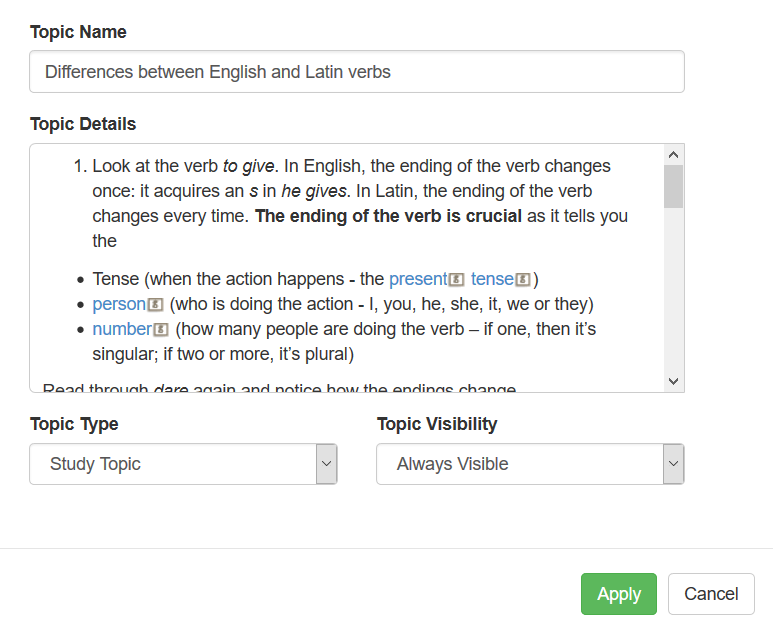
Click the Add Topic button to open the topic editor window.

Fill in the topic/section name and rich text editor to provide the actual topic content. This is usually your lesson or learning material.
The topic editor is a fully functional HTML editor in which can display HTML tags and formatting. You can also embed video tutorial from YouTube or other video sharing websites.
Select the topic type
You can create a regular Study Topic or a Summary Topic. The only difference is that the Summary topic is showing a different color when displayed to students.
Select Topic Visibility
Topics/sections can be marked always visible, invisible or only visible during a time frame. The latter requires to select the date range during which the topic will be available.
To hide a topic from your course make it invisible. Some course creators prefer to unlock one topic at a time by either toggling their topic visibility or just scheduling topic visibility by dates.
To save your topic click Apply.
The topic will now show up in your course builder and you can add resources to it or move it up or down the list changing its position among other sections/topics.
Adding Topic Resources
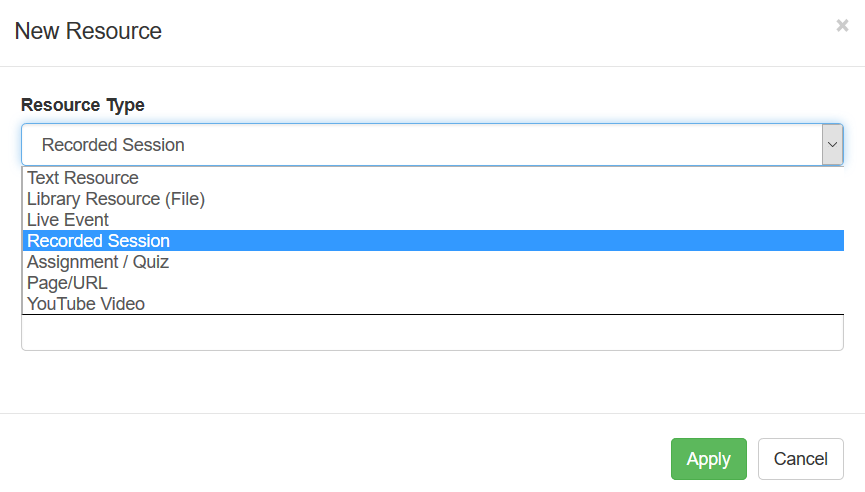
Each topic may have multiple topic resources that are displayed along with the topic. Topic resources can be:
- Text Resources
- Library Resources (Files from your resource library)
- Live Online Events/Sessions (in the Electa Live Virtual Classroom)
- Recorded Sessions (of Electa Live Sessions)
- Assignments / Homework
- Quizzes
- Links to pages (URLs)
- YouTube videos
To add a new resource click the Add Resource button next to the topic. Select the type of resource, fill in the requested information and click Apply.

Topics and topic resources can be added to existing courses at any time.
Notify Course Subscribers About New Topics and Resources
Each time you add a new resource or a new topic to your course you may want also to send an email notification to your students enrolled in this course. You can do so automatically by selecting the checkbox just below the new topi / resource window.

An automatic email will be sent to all enrolled students upon creating the topic/resource.
Video Tutorial