This article discusses the following topics:
- How to manage and handle multiple payment profiles.
- How to direct payments for courses and events into different PayPal addresses.
By default when you create and activate a new payment profile it automatically becomes available for all paid courses and events. Which means that your students may choose to pay through any of your active payment options when they sign up for paid courses or paid live classes.
There may be certain scenarios in which you may want to have more than one
option to to accept payments to - like for instance two different bank
accounts or different PayPal addresses. In certain cases however you may want to
receive payments for a certain event or course into a specific
account (PayPal, Bank or Credit/Debit Card).
To do this you need to have more than one active payment profile. Once you have your paid course (or paid live event) created and configured as usual you can specify which payment profiles will accept payments for that specific course (or event).
Specifying Payment Options for Online Courses
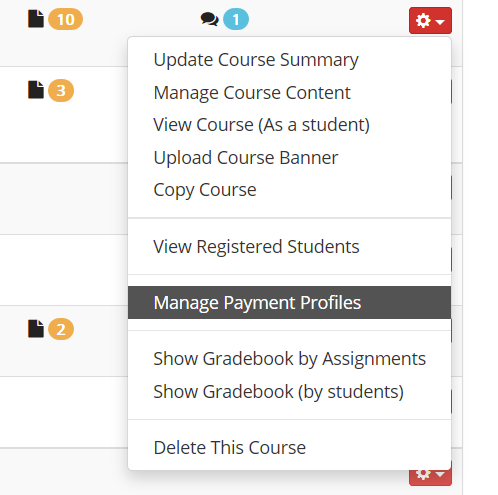
Open the Course Manager on your administrator menu and find your paid course. Click the red options button and then click on Manage Payment Profiles. This menu option will only show up for paid courses.

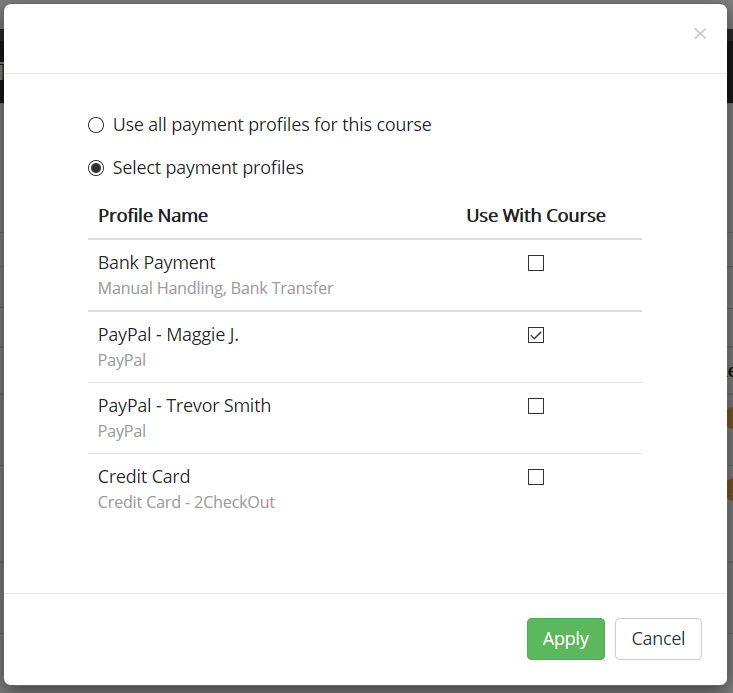
This will open the Payment Profiles selection dialog for this specific course. By default all active payment profiles are allowed to accept payments for this specific course.
To select a specific profile click the respective option and mark the profiles that will be accepting payments for this course.

Click Apply to activate the new configuration.
Similarly you can do for paid events and paid live sessions. To configure specific Payment Profiles for a paid live event use the Payment Profiles option available in your Live Class Calendar for the respective paid session.