To assign exiting students to existing student groups, please follow the below steps:
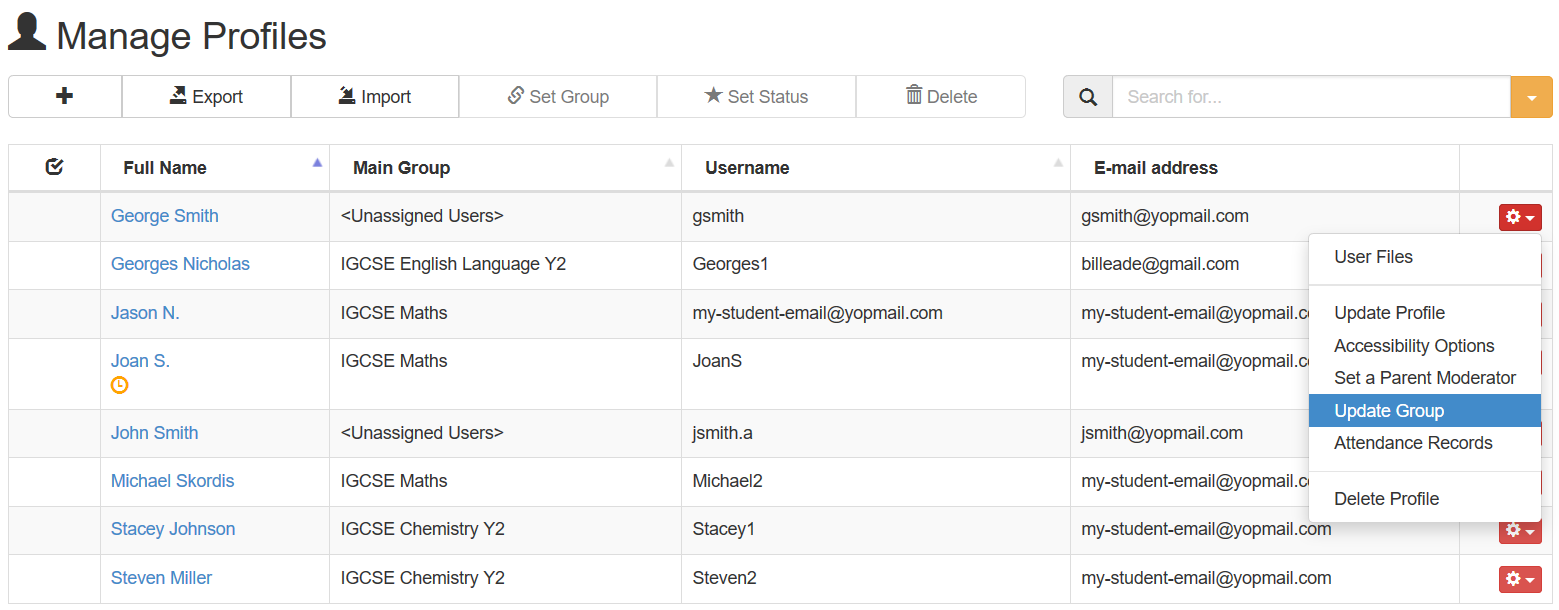
Log into your admin or teacher profile and click on Student Management -> Student Profiles. This will bring up the list with your students.
You can use the search box to search your database. Once you have found the student of interest click the red option button next to the name and select Update Group.

Please note that if you are logged in with a teacher profile you need to have permission to manage student accounts before you can assign groups. Teachers can only see their own students (that is - students who they have been assigned as Default Moderator), unless your account administrator has given you access over the entire student database.
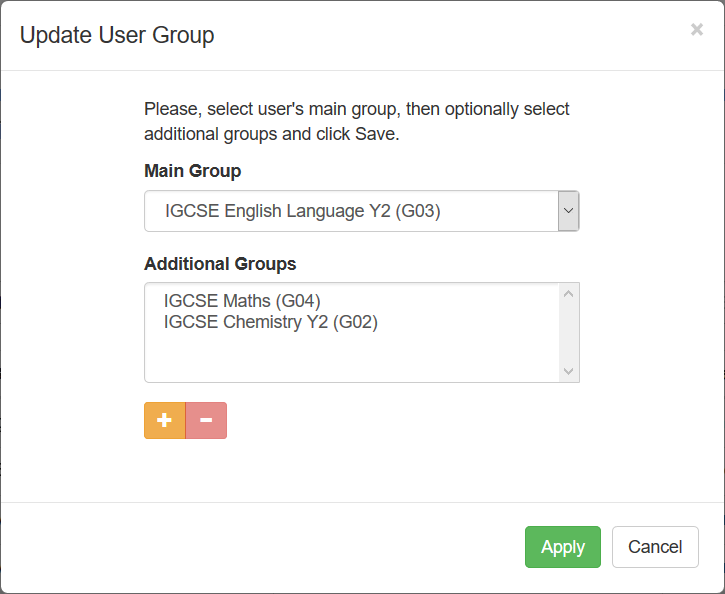
After you click on the "Update Group" menu option you will be able to select the primary (Main) and secondary (Additional) groups of the student.

The Main group is the group that is most relevant to your student. This could be any of your groups but you would probably chose the one that best matches your student or the one that you would use most often with them. You can also set up any number of secondary (additional) groups.
Please note that your groups must be already created. To do so please refer to Create and Manage Student Groups.
An example scenario could be that you created the following groups:
- Students Year 8
- Students Year 9
- Students Year 10
- English Language
- Latin Language
- Science
- History
- Geography
So you could use one of the "years" groups as a primary group and the "subject" groups as additional groups.
You can read more about student grouping in Understanding Student Grouping.