Asynchronous (self-paced) courses consist of some summary information and content. This article discusses the course summary part. The course content is described in another article.
To create a new course navigate to the main menu - Courses -> Course Manager. This will take you to the course catalog where you can find a list of all your current and past courses.
Click the Create button to open the Course Builder and fill in the below form:
General Course Information and Format
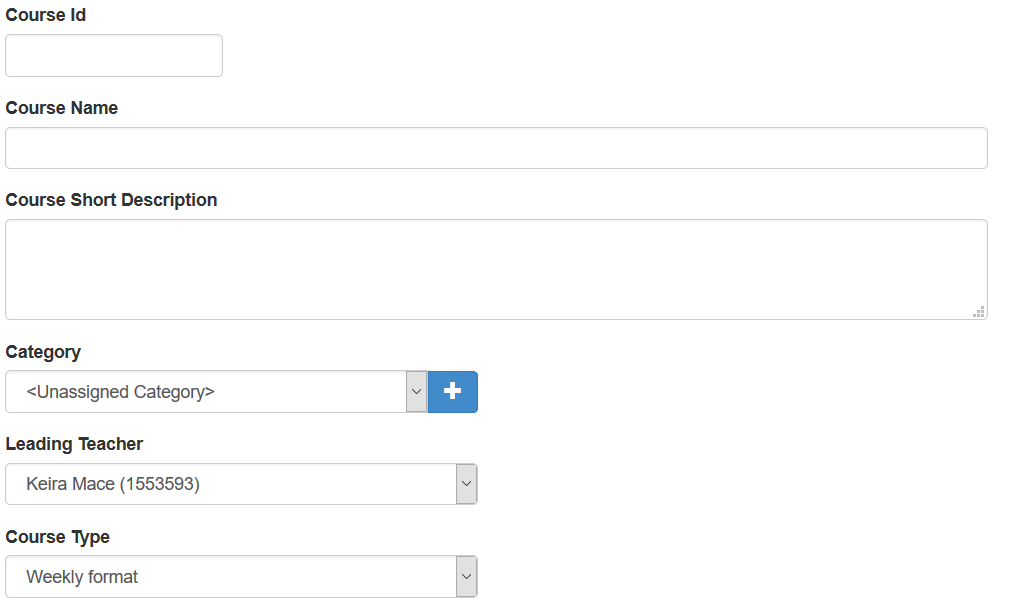
Course ID, Course name, Description - basic course information. You can also select a course category from already existing categories or create new one on the fly.
Select a course leader from the Leading Teacher
drop-down. The course leader can build course content along with the
administrator users. This is suitable in case the course leader differs
from the course creator.
Course Type can be one of the following: Weekly format, Course with topics, Course with sections. The course Type (aka format) determines how course content is presented to students.
The Weekly Format is suitable for courses which provide a new content each week. Each topic is actually a week can be made available for a certain period of time. The weekly format is suitable for courses which are to cover a certain number of weeks.
"Course with topics" is another general type of course where each topic is presented separately but it is not necessarily time bound. Topic based format is suitable for courses which have to cover a certain number of topics rather than weeks.
"Course with sections" is a format similar to the "Course with topics". The difference is that each sections are displayed simultaneously unlike topics, which are dispelled one at time. This format is suitable for short term courses that focus on providing a certain set of resources rather than topics.
Setting course time-frame and availability
The next step would be to specify the course time frame - starting date and optionally the ending date, as well as the access type of the course.
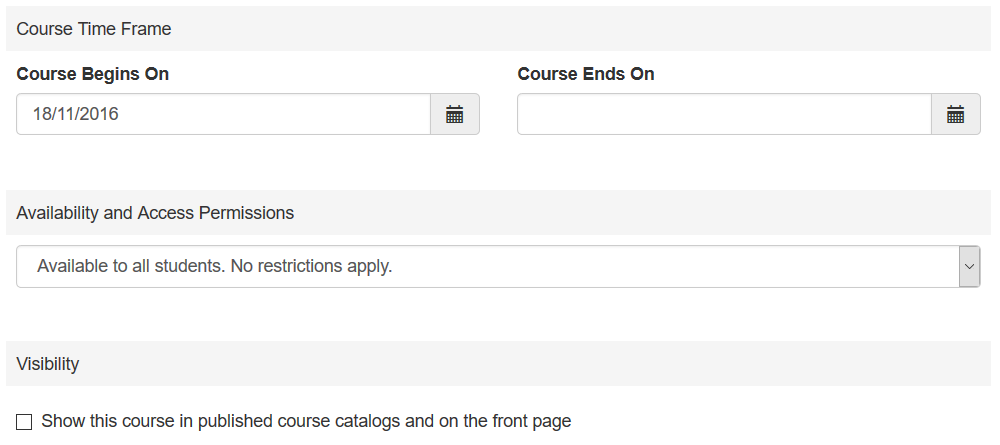
Specify the starting date of the course (Course Begins On). Optionally you can leave the "Course Ends" field empty making this an ongoing course.
Through the "Availability and Access Permissions" option you can specify who can have access to this course. The following options are available:
Available to all students. No restrictions apply. - This type of access would make the course available to all students that exist in your database. Anyone with a username/password would be able to access the course.
Only pre-selected students are allowed to access the course. - Such courses are only accessible to people who you choose from your database. Upon saving this course you will be given an option to enroll students into it.
Course with self-registration. Guests and students will be required to register. - This type of access is generally open for everyone but a registration is required in advance. This is also how you can create paid access courses. This type of course is discussed in a separate article.
Course Visibility - this option, when turned on, will make the course available in published calendars as well as on your front page. Please note this does not affect the access to the course described above. It only applies to the visibility if the summary course information - ID, name and description. You may want to make self-registration and paid courses visible in your published calendars so that users can register for them.
Video Guide
Optionally provide private feedback to help us improve this article...
Thank you for your feedback!